Setlists
Use setlists to manually group and arrange your scores, and to quickly navigate between them
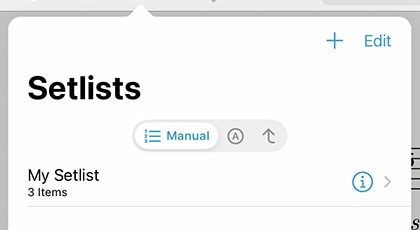
The Setlist Menu
Unlike the score menu, with automatically generated contents, the setlist menu is completely manual. Create a setlist or setlist folder by tapping the + button and typing in a title, and rename or move it up or down by tapping the edit button. Tap on any setlist to view or its contents.
The main list of setlists and the contents of each individual setlist can be sorted manually, alphabetically, by least-recently played (fresh), and more. A setlist’s contents can also be sorted randomly and shuffled at any time: drag the list downward until you see the refresh control, then let go to re-shuffle the queue.
Tip: When creating a setlist, tap the icon on the right-hand side of the text field to change whether the new setlist is inserted at the top or bottom of the list.
Setlist Editor
While viewing the contents of a setlist, use the + button to add new items to it. A full-screen editor will appear, showing you the current setlist on the left and your library on the right. The library menu is very similar to the score menu, allowing you to browse by categories and sort lists as needed to find what you’re looking for.
Tap on any item in the library menu (on the right) to add it to your setlist (on the left). You can also remove items from the setlist or rearrange them at any time.
You can also replace an item in your setlist by tapping to select it. Once it starts pulsating, select another item from your library to take its place. Or, if you change your mind, tap the setlist item a second time to de-select it.
On the setlist side, tap the + button to add the current score to your setlist or create a placeholder with a custom name. On the library side, tap the checkmark icon to add all of the items listed below to your setlist at once.
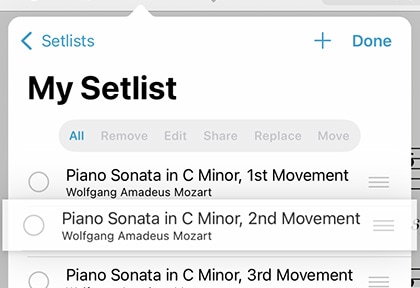
Rearranging Setlists
When viewing a list in manual sort order, you can arrange your setlists or their contents using Drag and Drop gestures or by tapping the Edit button and using the control on the right-hand side of each item (three horizontal lines). Tap and hold the control until the row pops out of the table view, and then drag the score upward or downward and let go when you reach the correct spot.
Deleting Setlists & Removing Items
To delete an entire setlist, swipe your finger across it from right to left and confirm by pressing the red Delete action. You can also tap the edit button and select one or more setlists, then choose “delete” from the edit dropdown menu.
Use the same process within a setlist to remove one or more of its entries (note that this uses an orange Remove action instead of a red Delete action since removing an item from a setlist doesn’t affect the original item).
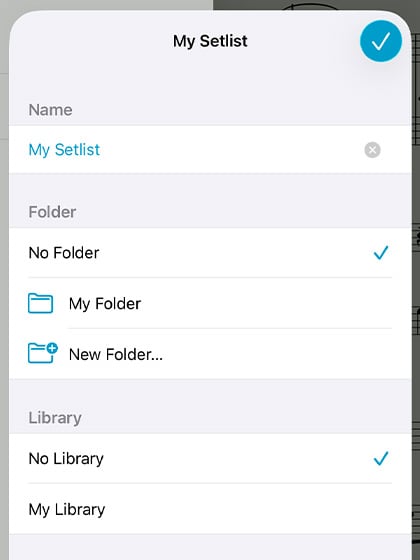
Setlist Metadata
The setlist metadata panel lets you change a setlist’s name, manage its folder location, or choose which libraries it belongs to (if you’ve created any). Tap the info button next to any setlist to see these options. You can also use edit mode to select several setlists and choose the “edit” option from the dropdown menu to batch edit them.
Setlist Folders
Use folders to better organize your setlists. Unlike in the score menu, where an item can appear in multiple category lists based on its attributes, folders are concrete locations; a setlist can only ever be in one folder at a time, just like on a computer.
This allows you to do things like create an “archived” folder for setlists you want to keep but aren’t currently using.
To create a new empty folder, tap the + button and choose “Add Folder” and supply a name when prompted. Folders can be rearranged and mixed in with your other setlists, so feel free to put them anywhere in your list.
Use the setlist metadata panel to move a setlist into or out of a folder. Tap the info button next to any setlist or use edit mode to select multiple setlists and batch edit them to change their folder location. Select any existing folder, create a new one, or select “no folder” to move your setlist or setlists.
Note: If you use libraries, creating a setlist folder permanently assigns it to the current library. Setlist folders can only contain setlists that are also assigned to that library.
Edit Mode Actions
In the main list of setlists, entering edit mode and selecting a setlist will allow you to perform several different actions: delete, duplicate, share, or edit its metadata. If you select multiple setlists, you’ll be able to either delete them or batch edit some of their metadata. Below you’ll learn more about the actions we haven’t already covered in this section.
Sharing Setlists:
Setlists can be shared in a variety of different ways. You can share a simple text list, a forScore-specific ‘4SS’ file format, or as a single PDF (with or without permanent annotations).
The 4SS file format is the best way to share your setlists with other forScore users. You can choose to send just the setlist information, in which case it’s up to the recipient to provide their own PDF files (forScore uses placeholders for missing files). Or, you can send the setlist and all of its associated files (you can choose whether or not to include score-specific metadata).
Duplicating Setlists:
Use the “duplicate” action to create a second copy of a setlist. This can be helpful if you have a setlist that you use often but need to tweak for a specific situation—make your changes and the original will remain intact.